
Are you preparing for the BLS skills test or looking to refresh your knowledge from training? This study guide is designed to help you recall essential concepts effectively and ensure you are ready to respond in an emergency.
Basic Life Support (BLS) is a crucial course for individuals who want to develop life-saving skills. After completing the training, you will be equipped to handle life-threatening situations by performing high-quality chest compressions, providing rescue breaths, and using an Automated External Defibrillator (AED).
This study guide serves as a valuable resource both before and after your training. It reinforces key principles of Cardiopulmonary Resuscitation (CPR) and other critical life-saving techniques, helping you stay prepared to act confidently in emergencies.
Introduction of Basic life support
Basic Life Support (BLS) is a vital life-saving technique used in emergencies where a person’s breathing or heartbeat has stopped. It is performed by both healthcare providers and trained bystanders to maintain vital organ function until advanced medical care is available. BLS plays a critical role in situations such as cardiac arrest, choking, drowning, and other life-threatening conditions.
The BLS guidelines are updated every five years based on the latest medical research and advancements. Additionally, a BLS certification is valid for only two years, after which individuals must undergo recertification to stay up to date with the latest techniques and protocols.
What is CPR?
Cardiopulmonary Resuscitation (CPR) is a life-saving emergency procedure used to assist individuals who are experiencing cardiac arrest, stroke, or other life-threatening emergencies. It helps to maintain blood circulation and oxygen supply to vital organs such as the heart, lungs, and brain until professional medical help arrives.
In the United States, over 350,000 people die due to cardiac arrest and a delay in performing CPR. According to the American Heart Association (AHA), immediate CPR combined with the use of an Automated External Defibrillator (AED) can increase survival rates by restoring a normal heart rhythm within minutes. If CPR is not performed within a minute, then the victim’s brain can get damaged in 6 or 10 minutes.
Also read: BLS Vs CPR- What’s the Difference Between BLS and CPR?
How to recognize sudden Cardiac arrest?
Sudden Cardiac Arrest (SCA) occurs when the heart unexpectedly stops beating, preventing blood from reaching the brain and other vital organs. It is a life-threatening emergency that requires immediate action to improve survival chances.
Signs and symptoms of Sudden cardiac arrest:
1. Sudden Collapsed: The victim may fall suddenly without making any helping sound.
2. Unresponsiveness: When a victim doesn’t respond while calling them, or touching them to perform CPR.
3. Absence of Normal Breathing: The victim is not breathing or is gasping for air (agonal gasps)
4. The skin changes: The victim’s body turns pale or bluish due to a lack of oxygen.
5. No pulse: In a cardiac emergency victim can lose the pulse and heart rhythm.
If you recognize cardiac arrest quickly it helps to double or triple the chances of survival.
How to perform CPR?
While performing CPR, it is essential to follow each step carefully. Incorrect hand placement or applying the wrong compression rate and depths can lead to serious injuries or reduce the effectiveness of resuscitation efforts. It’s important to note that the compression technique may vary slightly between adults, children, and infants.
Steps to perform CPR on adult
Here are the steps to perform CPR on an adult. Follow the steps and learn more in-depth.
1. Ensure the safety of an adult victim
The first step is to check for any potential dangers around the victim. Before performing CPR, make sure the environment is safe for both you and the victim (for example: no electrical hazards, fire, etc).
2. Check for responsiveness
While starting CPR make sure to check the responsiveness of victims by gently tapping the person and shouting, “Are you okay?”If there is no response, call for emergency help immediately or instruct someone nearby to do so.
3. Check for Breathing and Pulse
Look, listen, and feel for normal breathing and the pulse of an adult. By looking for chest rise, listening for sounds of breathing or any gasping and feeling for a pulse on the carotid artery ( side of the neck). If the person is not breathing, then start providing CPR immediately.
4. Start Chest Compressions
1. Hand Placement:
Proper hand placement is crucial for effective chest compressions. Place the heel of one hand on the lower half of the breastbone (sternum), then place the other hand on top and interlock your fingers. Always keep your elbows straight and shoulders directly above your hands to apply even pressure and perform compressions correctly.
2. Compression Rate:
The compression must be 100 to 120 per minute. (aim for the rate of “Stayin’ Alive”).
3. Compression Depth:
Push hard and deep, at least 2 inches (5 cm) deep, but not more than 2.4 inches (6 cm).
4. Recoil:
Allow the chest to fully recoil between compressions, but do not lift your hands off the chest.
5. Continue Compressions:
Continuously perform 30 chest compressions before moving to rescue breaths.
5. Give Rescue Breaths on an adult
When providing rescue breaths to an adult, give 1 breath every 5 to 6 seconds, which is about 10 to 12 breaths per minute. Each breath should last around 1 second, just enough to make the chest visibly rise. Don’t give too much or breathe too forcefully, as this can lead to complications such as gastric inflation.
6. Continue CPR
Continue performing high-quality CPR by maintaining a cycle of 30 chest compressions followed by 2 rescue breaths. Make sure to keep the compressions deep and at a rate of 100–120 compressions per minute by allowing full chest recoil between each compression. Continue CPR until the patient starts to show any signs.
Also read: ACLS Study Guide
Steps to perform CPR on an infant child
Infant CPR is different from adult and child CPR. Infant skin is sensitive, and we need to be careful when touching their skin.
1. Keep infants in a safe place:
Infants are very sensitive and so never leave them in inappropriate environments that might lead to severe damage to the small baby’s body.
2. Check the responsiveness:
It is a crucial step to check the responsiveness of the child by tapping their feet gently. If they are unconscious and not responding, then you need to perform CPR or immediately call Professionals for help.
3. Check for breathing:
Check for breathing by carefully analyzing the chest movement of infants or children, and also listen for breath. If they are not breathing, then start performing CPR or immediately call for help.
4. Ensure Proper Head and Neck Support:
When performing CPR on an infant, it’s very necessary to place the baby on a firm, flat surface. Ensure the baby is on their back with their head and neck properly supported to maintain an open airway.
5. Begin chest compressions for infants:
While performing chest compression follow these steps :
1. Position Your Fingers: Place two fingers of one hand in the center of the infant’s chest, just below the nipple line, on the breastbone (sternum).
2. Apply Firm Pressure: Press down securely, compressing the chest about 1/2 inch (1.25 centimetres). Be sure to allow the chest to fully recoil between compressions.
3. Maintain rhythm: Perform chest compressions at a rate of about 100-120 compressions per minute, aiming for consistent and effective compressions. Continue this method until help arrives or the infant starts to show signs of recovery.
6. Give rescue breaths:
To give rescue breaths to an infant, cover the infant’s nose and mouth with your mouth, creating a seal. Give gentle breaths lasting about 1 second each, watching for the chest to rise with each breath. Make sure not to blow too hard.
7. Continue CPR:
Continue CPR by alternating 30 chest compressions with 2 rescue breaths. Repeat this cycle without stopping until the infant starts to breathe on their own, an AED becomes available, or emergency medical help arrives to take over.
Hands-Only CPR
Hands-Only CPR is a simplified form of cardiopulmonary resuscitation (CPR) that involves chest compressions only, without rescue breaths. It is recommended for use on teens and adults who suddenly collapse and are unresponsive. An untrained bystander can perform hands-on CPR if they are comfortable. It helps maintain blood flow to vital organs until emergency medical help arrives. To perform hands-only CPR follow the crucial steps:
1. Call emergency services immediately (or ask someone else to).
2. Push hard and fast in the center of the chest at a rate of 100–120 compressions per minute, about 2 inches deep.
Hands-Only CPR can help keep blood flowing to vital organs until professional help arrives and is especially useful for bystanders who may not be trained in full CPR.
Airway management and breathing
Airway management ensures clear the obstructed path for breathing and manages the flow of oxygen. It is a critical procedure and an essential skill necessary for all physicians working in the emergency department. This section covers three key components: Opening the Airway, rescue breathing, and choking management.
1. Opening the Airway
When a person becomes unconscious, the muscles that keep the airway open can relax, allowing the tongue to fall back and block the throat. Opening the airway helps restore airflow.
Head-Tilt, Chin-Lift Technique:
This is the most commonly used method in patients without a suspected spinal injury. The rescuer places one hand on the forehead and tilts the head back while using the other hand to lift the chin upward. This maneuver moves the tongue away from the back of the throat and opens the airway.
Jaw-Thrust Maneuver:
The jaw thrust maneuver opens the airway while keeping the cervical spine stable. This method is used when there is a risk of spinal injury (e.g., trauma patients). The rescuer kneels behind the patient’s head, places fingers behind the angle of the jaw, and lifts it forward without moving the neck.
2. Rescue Breathing
Rescue breathing is performed when a person has a pulse but is not breathing normally. It provides vital oxygen until normal breathing resumes or advanced care arrives.
Mouth-to-Mouth Ventilation:
The rescuer pinches the victim’s nose shut, seals their own mouth over the victim’s, and provides breaths. Each breath should last about 1 second and cause the chest to rise visibly. It’s commonly used in emergency settings when no barrier device is available.
Mouth-to-Mask Ventilation:
This method uses a pocket mask with a one-way valve, creating a safer and more hygienic way to deliver breaths. The mask is placed over the victim’s nose and mouth, and the rescuer breathes through the valve. It’s ideal for rescuers who are trained and have access to the equipment.
Also read: CPR vs Rescue breathing
3. Choking Management
Choking occurs when the airway is blocked by a foreign object, such as food, or choking on water. If proper action is not implemented then it may become life life-threatening situation.
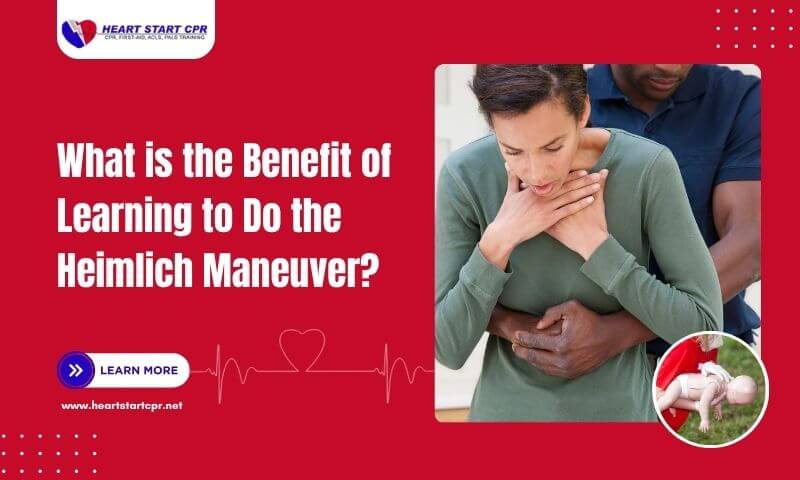
1. Heimlich Maneuver (Abdominal Thrusts):
This is the standard method for treating a conscious adult or child with a severe airway obstruction. The rescuer stands behind the person, wraps arms around the waist, and delivers quick upward thrusts just above the navel. This increases pressure in the chest and forces air from the lungs, potentially expelling the object.
2. Back Blows and Chest Thrusts (for Infants):
For choking infants under 1 year old, the rescuer supports the infant face-down along their forearm and delivers five firm back blows between the shoulder blades. If the object isn’t expelled, the infant is turned face-up, and five chest thrusts are delivered using two fingers just below the nipple line. Repeat until the object is expelled or the infant becomes unresponsive.
Automated External Defibrillator (AED)
An Automated External Defibrillator (AED) is an electronic device used to help someone who is experiencing cardiac arrest or has stopped breathing. It analyzes the heart’s rhythm and, if necessary, delivers an electric shock to restore a normal heartbeat. It is portable and very easy to use because it provides clear voice and visual instructions throughout the process. They are commonly found in public places like airports, schools, malls, and offices. It is utilized when a person faces cardiac arrest, stops breathing, or becomes unresponsive.
How to use an automated external defibrillator?
An automated external defibrillator is a useful tool to save lives from threatening situations. If you are trained in CPR courses then you can easily perform it. Here are the steps to use an automated external defibrillator:
1. Check the victim:
This is the first and most critical step for any trained bystander or healthcare professional when responding to a suspected sudden cardiac arrest. Assess the victim carefully:
1. Ensure the victim is unconscious and not breathing normally.
2. Gently tap the person and shout to check for responsiveness.
3. Observe chest movements and listen for breathing sounds for no more than 10 seconds.
2. Call Emergency Services:
Immediately dial 911 to emergency medical services (EMS). If other people are present, assign one person to call EMS and another to start cardiopulmonary resuscitation (CPR) or retrieve the AED.
3. Turn on the AED:
The next step is to turn on the AED. The device will give audio and visual prompts to guide you through the process. By following AED audio you can perform effectively.
4. Attach the Pads:
Apply the AED pads to the bare chest following the placement diagram on the pads:
1. Use adult pads over 8-year-old adults and children.
2. Use pediatric pads under 8 years old child. If unavailable, adult pads may be used but i shouldn’t touch or overlap.
3. A manual defibrillator is preferred for an infant.
5. Deliver Shock if Advised:
After attaching the pad let the tool analyze the heart rhythm and it will deliver the shock automatically or advise you to press a button. While delivering the shock make sure no one is touching the victim’s body to avoid accidental shock.
6. Resume CPR:
Continue with CPR cycles (30 chest compressions and 2 rescue breaths) immediately after the shock or as instructed by the AED. Use an automated external defibrillator until EMS arrives or the victim shows signs of life, such as breathing or movement.
The special situation in BLS
Basic life support is needed anytime for the victim who is facing a situation like drowning, choking, trauma and shock management. Here is how to adapt to the situation and give proper care to the victim:
Drowning
Drowning occurs when someone submerges into the water and they find it difficult to breathe under the water. Quick actions need to be implemented to save the victim from damage to the brain and other vital organs.Follow the proper way to save the victim from drowning
1. Call for medical help immediately
2. Take the victim out of the water
3. Check their responsiveness by asking for their condition in a clear and loud voice
4. Perform high-quality CPR
5. Continue it until the victim is normal or the emergency help arrives
Also read: How to revive a drowning victim?
Opioid Overdose (Naloxone Administration)
Opioid overdose is a life-threatening condition caused by excessive use of opioid drugs such as heroin, morphine, fentanyl, oxycodone, or codeine.
Signs of Opioid Overdose:
1. Unconsciousness or unresponsiveness
2. Slow, shallow, or absent breathing
3. Pinpoint pupils
4. Pale, bluish, or cold skin
5. Gurgling or snoring-like sounds
Immediate Action:
1. Call 911
2. Administer Naloxone (Narcan)
3. Perform rescue breathing or CPR as needed
4. Monitor until EMS arrives
Also read: Common Administration Routes for Naloxone
Shock Management
Shock is a life-threatening condition where the body isn’t getting enough blood flow.
Treat for shock:
1. Lay the person flat (unless spinal injury or difficulty breathing).
2. Keep them warm and still.
3. Do not give anything by mouth.
Post-resuscitation care
Post-resuscitation care is a medical treatment and support provided to a patient after they have been successfully resuscitated from cardiac arrest but are still critically ill. In that time patients need extra care and support.
1. Recovery position:
If the victim is breathing normally and has a pulse then place the victim in the recovery position. This position helps keep the airway open and prevents choking if the person vomits.
2. Monitoring the Victim Until Help Arrives:
Sometimes even after resuscitation the victims can become unconscious or stop breathing so close observation is vital in emergencies. Check from time to time the patient’s condition and be ready to restart CPR if it is necessary. Try to provide reassurance if the victim regains consciousness and keeps them calm.
3. Transfer to Advanced Medical Care
If the condition remains the same and the victim is feeling more difficulty in breathing then quickly transfer to a hospital or advanced medical care. In advanced care, the victim will get a full medical evaluation from the medical professionals and they continue to monitor the victim’s condition by ECG, oxygen levels, brain function, and pulse check and rhythm assessment.
Also read: What is the Return of Spontaneous Circulation(ROSC)?
Team dynamic in BLS
Effective team performance is crucial to save victims from emergency situations. Whether it’s a single rescuer or a coordinated group effort, good communication, clear roles, and mutual support are essential for improving outcomes during CPR.
1. Single-Rescuer CPR:
When there is only one person available to save patients, they must perform all tasks themselves such as:
1. Check responsiveness
2. Call for help
3. Start chest compressions
4. Provide rescue breaths.
2. Multi-rescuer CPR:
When there are two or more people involved while rescuing a victim then they must perform tasks together. For example, One rescuer can perform chest compressions, while another manages the airway and gives rescue breaths, and a third can operate the AED( Automated External Defibrillator).
Also read: When Should The Rescuer Operating The AED Clear The Victim?
3. Role Assignments During Resuscitation
When assigning roles to each team provides effective performance, and reduces their hesitation and confusion.
Team Leader:
The team leader is responsible for overseeing the entire resuscitation process, delegating tasks effectively, and ensuring high-quality chest compressions. They also coordinate the use of CPR tools such as bag-valve masks and automated external defibrillators (AEDs).
Compressor:
While working together the task is assigned to deliver the CPR and switch roles every 2 minutes to prevent fatigue.
Airway Manager:
The healthcare professional is responsible for providing rescue breaths using a barrier device or bag-valve mask and monitors the patient’s airway and breathing.
AED Operator (if available):
The AED operator is trained to properly apply and operate an Automated External Defibrillator (AED) on adult or infant patients experiencing cardiac arrest they ensure timely and effective use during resuscitation.
BLS Practice and Skills Testing
Basic Life Support (BLS) training provides essential life-saving techniques used in emergencies involving cardiac arrest, respiratory failure, and obstructed airways. Certification is awarded only upon successful completion of a BLS examination, which validates both knowledge and hands-on skills.
If you’re looking to assess your proficiency before taking the final exam, our online BLS practice test is a valuable tool. It helps reinforce your understanding of BLS protocols and prepare you for real-life emergency scenarios.
After passing the BLS examination, you’ll receive a certification which will be valid for two years. To maintain your competency, you can enrol in a BLS renewal course, which is designed to refresh your skills update you on the latest American Heart Association (AHA) guidelines, and boost your confidence in handling emergency situations.


